29.1.13

Weaving Stories with Grade 4


There is something about a weaving that seems so much more lasting than other art forms. They seem to stand the test-of-time, making it through many spring cleanings. Or maybe I just think that because my in-laws still have a sweet little weaving that my husband made in elementary school tacked up to their dining room wall. (My husband vows that since he made it, it has never moved from that place).  

There's also a satisfaction that comes from working with something tactile and maniplulating soft materials such as thick, heavy wool, that children seem to love.

For this grade 4 weaving project, I was inspired by a fabulous post over at New City Arts.

In these cardboard loom weavings, students were asked to tell the story of an important family memory. They made a sketch and planned out their colours beforehand, each representing a component of their story. Then they learned how to string the loom and weave.  

The weavings took a while to get going, and many students had false starts, but after some one-to-one coaching and a few good lines in a row, they all got the hang of it. And then they loved it. 

When they were finished, I had them make a good copy of their colour key to display with their weaving. I put them together side-by-side in a clear plastic sleeve to display outside the art room. 

Here are some gems:


12.1.13

Grade 2 Clay Owl Pictures

As follow-up to one of my fall lessons here, I wanted to share just a few pictures that I took of students' clay owls. The project was a huge hit, and the kids were very keen to wrap their owls up in little organza bags and give them as holiday gifts.


The owls on display in the glass hallway cabinet. (I put in some pinecones and branches so they would feel at home.)

5.1.13

Mask-Making with Grade 7


For a few terms now, I have been doing a mask-making project with Grade 7s. It's very involved, but the kids love it and I've found that almost everyone experiences a successful result. I've also loosely tied it in with a Social Studies unit where students study ancient Greece (and Greek theatre). I take about 20 minutes of the class before the mask-making to look at examples of Greek theatre masks and talk about the exaggerated facial features. Students roughly design their mask expression and theme before the next class.

Working in pairs, students put on garbage bags to protect their clothing, and then the first partner (the model) puts on a shower cap to protect their hair. A generous amount of Vaseline is applied to the model's face, making sure to cover the eyebrows and sideburns well. The model then sits down in a chair, head slightly back, and an exaggerated expression is made. The other partner begins applying small plaster strips (pre-cut into pieces of about 1 x 3 inches) dipped in lukewarm water, directly to the face.  (The plaster was purchased on a large roll at the art supply store.) Care is taken to avoid the eye area and the mouth. After applying strips all over the face, a second layer is added. Lastly, the nose area is covered and students have to breathe through their mouths for a little while.

A few minutes after the final strips are laid, I usually go around and check for weak spots in the masks before students remove them. If all is well, students start scrunching up their faces and wiggle the masks off. Masks are initialled with pencil on the inside, and laid to dry on balled-up newspaper.

The process is then repeated with the other partner. (It takes about 45 minutes to prep and cast each partner, so two blocks are needed to make sure everyone is casted.)

The next class, masks are dry and the exaggerated features can be built up using papier mâché pulp (I used Claycrete- a popular one found at art supply stores). As per package instructions, the pulp is mixed with water to create a clay-like consistency that can be molded and shaped into eyebrows, lips, noses, horns etc.
Some students take only one class block for this step (45 minutes), but others make take up to two, depending on how elaborate they want their masks to be.

Nose, chin, and horns are built up

Eyebrows and lips are built up

The pulp takes at least 48 hours to dry completely, and then paint can be applied. I have students use acrylics on their masks. With some colours, two layers of paint may need to be applied.


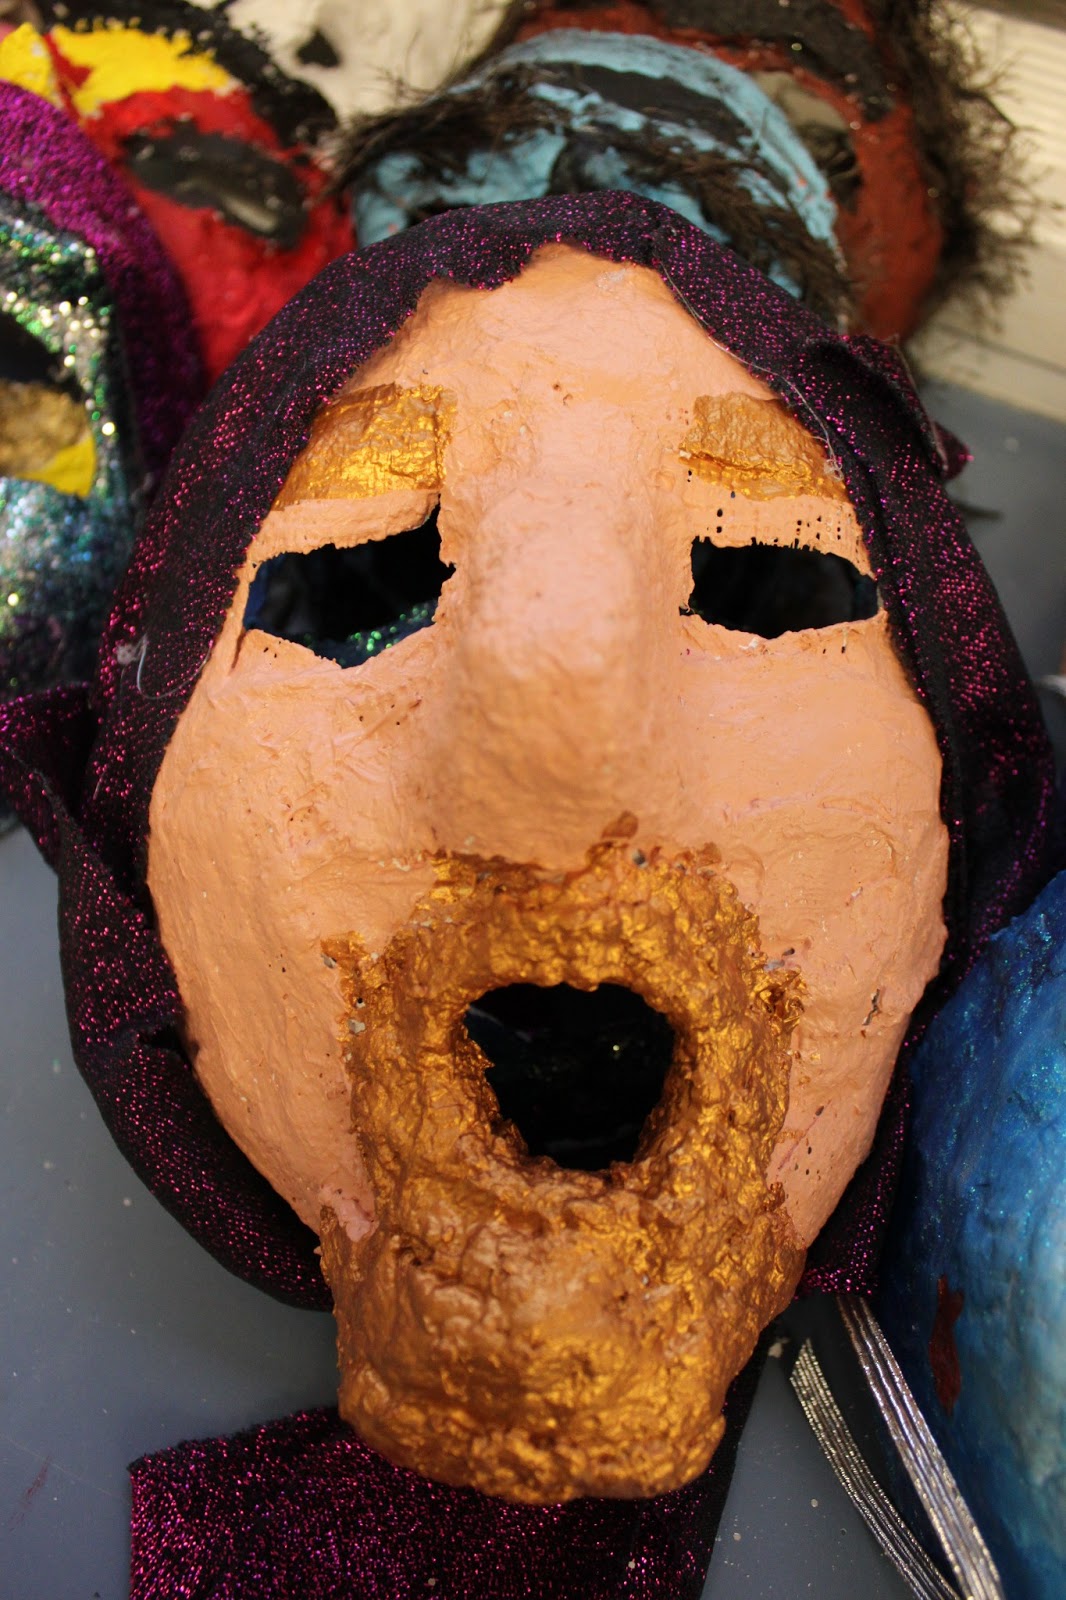
After the paint is dry, I give students several choices for finishing, such as adding gloss varnish, glitter, fabric embellishments (attached with a glue gun), or ribbons on the side of the masks.

Here are some of the amazing finished results. Students are hoping to perform with these masks in a play later this year.


29.12.12

Piled-High Burgers


Grade 4s did these collages back in November and I'm finally getting around to posting these pictures. They were super colouful on the art room walls. The primary kids, especially, loved them and stared at them with wide eyes every time they came into the room.

Where did I see this lesson first? I'm not entirely sure. I've seen these burgers many times floating around art various blogs and Pinterest. Please let me know if you are the first author of this lesson and I'll send a link back to your blog!

I gave students very little direction with this project. We brainstormed some burger ingredients, I quickly demonstrated how to cut buns, and asked them to carefully arrange ingredients on black paper before gluing. Some students were very imaginative with their burger ingredients. (Gingerbread men were a popular topping.). And I loved how other students figured out themselves how to create 3-D toppings like ripple chips.


12.12.12

Festive Reindeer


Grade 1s asked for a festive holiday project and I saw this on Pinterest this morning so I quickly made it happen for my afternoon class. I love how simple but striking these are. Thank you to ARTventurous who posted a great lesson on drawing and painting these little guys. The only addition I made was to have students add some small dabs of gel glue to the paintings at the end and sprinkle with a little bit of white sparkly glitter. You can never go wrong with glitter! :)


An empty bulletin board was just waiting for some festive cheer.
Got this up quickly this afternoon!


26.11.12

Rainbow Trucks in the City

These were fun. 
I found this great idea on Artsonia here for a Kindergarten lesson last week. On an 12 x 18 piece of heavyweight white paper, students used Sharpie to draw a horizon line and then buildings in the background. (Some of them got very creative with their building shapes!) Then they drew some road lines (although most of these ended up being covered-up by their trucks). Students each got a small stack of coloured rectangles (I think these were 2 x 3) and arranged them in the rainbow order. I gave a brown square and rectangle for the front of the truck and some small black squares for the wheels, which they cut into circles. Once arranging their order, they glued on their trucks. Finally, some students decided to add more details (such as ice cream cones, people, planes etc.). 


16.11.12

Clay Owls...in process

I have seventy Grade 2 students, so clay projects are a production (especially if I have to do two firings, one for bisque and one for glaze). This clay owl project from Teaching Art with Attitude that I found on Pinterest is great because they only need the one firing and they get finished with oil pastel and black paint/ink. Easy!

Students were each given a slab of low-fire terracotta clay, were shown an owl shape on the board, lightly drew their shape on the clay and cut it out using a wooden skewer. Then they smoothed the rough edges with some water.

Eyes were punched out with plastic lids, stamped in the middle with the top of a marker, and lines were drawn around the eyes. The beak was then drawn and cut out. Students then scored and slipped the eyes and beak and attached them to their owls. Wings were drawn, and texture was added with clay tools and the tops of markers.


Later in the day, I went around and poked one or two holes on each owl's head for hanging purposes. Then I placed wet paper towel over each one to minimize cracking in the drying process.

The owls have just been fired now and the kids are super excited to work on them in class next week.

I wanted to test out the finishing process, so here is my owl. I coloured on it with oil pastels and gave it a bath in watered-down India ink. Then I dried it off and attached some copper wire to hang it.


The original lesson said to bathe the owl in watered-down tempera but I decided to try India ink and loved the super black effect.


I heart Instagram.
Students' owls to be posted next week!