16.1.12
Swirling Skies over Cities at Dusk
Right before the winter break, I tried this Deep Space Sparkle lesson with my Grade 1s and they turned out fantastic. Students loved painting the swirling sky backgrounds in the style of Van Gogh and pasting on paper to create houses and buildings.
5.12.11
Castles in Clay
Here is a very successful clay project that my Grade 5s worked on last month!
My Grade 5 theme is Medieval and Renaissance art, and I thought it might be neat to look at castle architecture and build some castles out of clay. I got some inspiration from a picture of a clay castle that I saw on this K-8 Blog.
I only see each of my Grade 5s classes for about 12 weeks (1 term) and during that time, we try to explore as many different art materials as possible. With that in mind, I chose compress the project into fewer classes by opting to do the facade of a castle (rather than a 3-D model), and using air-dry clay. In this lesson, I also wanted to focus on as many ceramics skills as possible: slab-making, texture application, and the score and slip technique.
The first thing I had students do when they came into art the first day of the project was to have them draw "the castle of their dreams" in their sketchbooks. This really got everyone's creativity flowing. Then I showed them a short Prezi full of castle architecture images to get them even more inspired.
I showed students how to throw and roll out a slab of clay. They lightly drew the outline of their castle with a wooden stylus and used exacto blades to make nice clean cut outs of their castles.(I also had some pieces of canvas pre-cut for students to do their clay work on so that it wouldn't stick to the art tables.)
NB: Next time, I would have students make their slabs about twice as thick as we had some unfortunate breakages with castles that were too thin and fragile.
Then students started to divide up the castle and added texture to different areas. I have some great texture plates in my classroom, as well as scraps of textured material that worked wonderfully.
Finally, students added on the windows, doors, and other details with the score and slip technique, which I demonstrated.
![]() |
| Work in progress.... |
The castles were left to dry and then painted with acrylics and coated with gloss in the next class. Metallic paint worked very well on the air dry clay.

Finally, the castles were displayed together and propped up with these great little acrylic easels.
Here are the amazing results:
The possibilities are endless for lesson extensions and cross-curricular connections! (ie. making figurines to go with the castle, writing a story or poem etc....)
6.11.11
Kindergarten Lines and Paint Resist
With this lesson, Kinders have now moved on to painting with more than just one colour. This time, they got to use the entire tempera palette and they were sooo excited! I borrowed this line variety lesson idea from Mrs. Brown's Art. It's a great introduction and review of different types of lines.
![]() |
| A different take on the lesson...but with a brilliant result! |
The tree out my window....
I just had to post a picture of this beautiful maple tree glowing in the morning sun outside my art room window last week. As the cold sets in here in Vancouver, I know that I only have a little time left to admire it.
29.10.11
Memory Landscapes - Watercolour Monotypes
My Grade 3 theme is Canadian Art, so I invited in local painter and printmaker Wendy Morosoff Smith to give us a workshop on watercolour monotypes. Wendy spoke to the students about how her landscapes are created from memories of the impressionable places she has been. She asked students to then create their own "memory landscape" from an image of a place in their minds that they remembered vividly.
We used 8 x 10 plexiglass plates, with a surface that I had already scratched up with sandpaper (for adhesion). Then Wendy and I washed the plates with a mildly abrasive cleaner to take off any dirt or oil, and rubbed gum arabic all over the plates with a rag. Students each took a plate, traced it on white paper, and sketched out a rough drawing of their composition on that paper. Then they laid the plate on top of the paper again and began painting. To paint, we used watercolour paint in tubes mixed with a little bit of water.
After the paintings were dry to the touch (some students had to use the hairdryer to speed up the process), they were ready to print. Some high-quality Stonehenge paper in warm white had been pre-cut and soaked in water. One sheet at a time was dried off with towels when it was time to print. Wendy operated the small printing press (which I feel very lucky to have in my classroom!) as students stood by and watched the magic take place. They were so excited and could not believe their eyes as their prints emerged. The prints were then left to dry and flattened under some books.
The next class, students were asked to title their image, and were shown how to write the edition number and sign their name on the print. Even with a big example on the board. this was difficult for most students to do. Next time, I would work step-by-step with all students together. I also had little strips of paper pre-printed with information on the printmaking process we used and a section for the students to fill out describing the significance of their image. They then glued these to the back of the prints.
26.10.11
Grade 1 Tigers
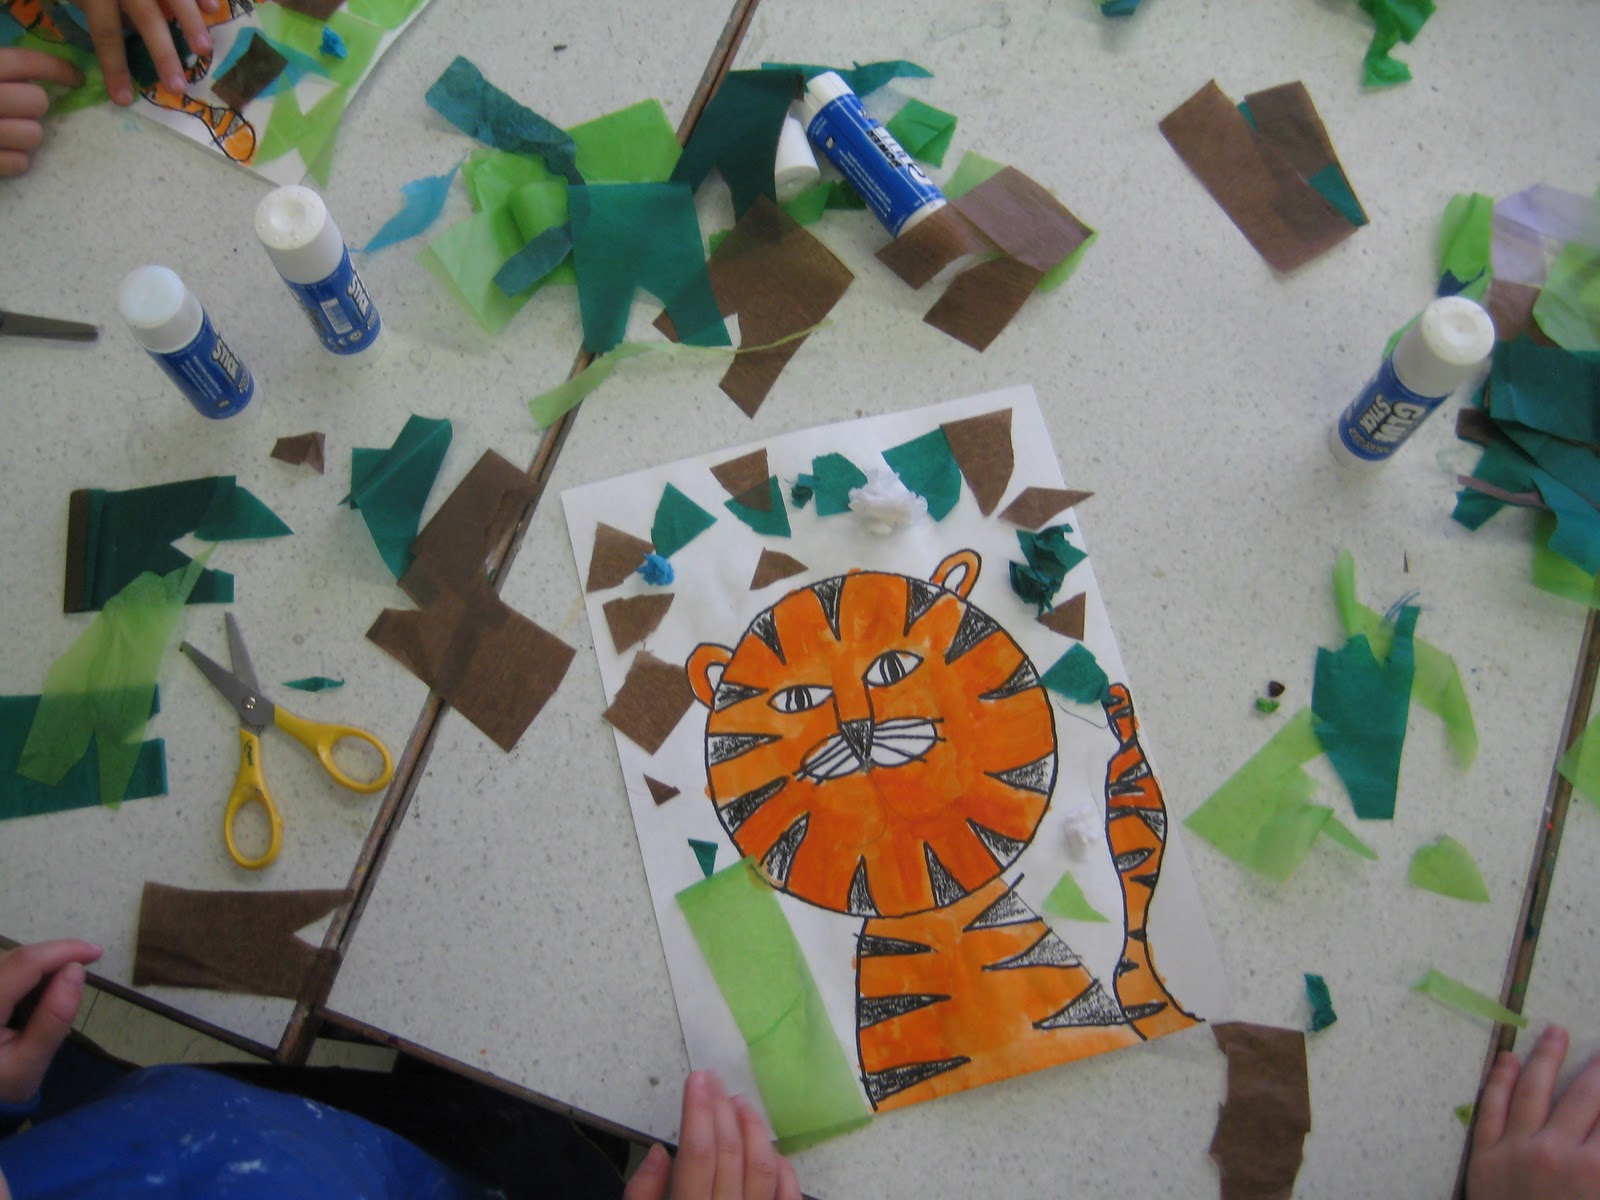
After a guided pencil drawing of a tiger (I broke it down into very small steps on the board), students went over their pencil lines with a Sharpie marker, coloured their tiger stripes with black crayon, applied orange watercolour paint, and then cut and glued leaf shapes from tissue paper. I love how these turned out. Each one has a different personality!
18.10.11
Colour Wheel Umbrellas
To begin, I did a directed drawing of an umbrella with my students. I showed them how to draw the little "hill" for the top of the umbrella, cut it down the middle, and then add 2 symmetrical sloping lines down on either side. Then I had students "jump" between the umbrella posts to create the characteristic umbrella edges. Students were then instructed to draw a j-shaped handle, and fill up the space around the umbrella with large raindrops.
After outlining their pencil drawings with Sharpie, I showed how to mix the primary colours to make secondary colours. Even though most students had some experience with mixing colours, that didn't stop all of the "oohs and ahhhs" when blue and red turned into purple. Students got to work painting their colours, and when they were done, they mixed white and black to create a grey and stormy looking background on another piece of paper. This first part took about 2 full blocks of class (1 hour and 40 minutes).
![]() |
Fall can be a very rainy time in Vancouver, and about a month ago, I started seeing these huge, vibrantly coloured umbrellas being toted all around town. Passing by the Vancouver Art Gallery one day a couple of weeks ago, I saw them displayed in the gallery shop window. These umbrellas inspired this colour mixing lesson with my Grade 2s, who had just finished their colour wheel pizzas.
To begin, I did a directed drawing of an umbrella with my students. I showed them how to draw the little "hill" for the top of the umbrella, cut it down the middle, and then add 2 symmetrical sloping lines down on either side. Then I had students "jump" between the umbrella posts to create the characteristic umbrella edges. Students were then instructed to draw a j-shaped handle, and fill up the space around the umbrella with large raindrops.
After outlining their pencil drawings with Sharpie, I showed how to mix the primary colours to make secondary colours. Even though most students had some experience with mixing colours, that didn't stop all of the "oohs and ahhhs" when blue and red turned into purple. Students got to work painting their colours, and when they were done, they mixed white and black to create a grey and stormy looking background on another piece of paper. This first part took about 2 full blocks of class (1 hour and 40 minutes).
The next class (when everything was all dry), I had students cut out cloud shapes from grey construction paper and glue them onto their grey painted background. Then they cut out their umbrellas and raindrops and glued those onto the background as well.
![]() |
| Cutting and pasting up a storm! |
![]() |
| Voila-beautiful! |
Subscribe to:
Posts (Atom)