17.5.12

Landscape with Cypresses


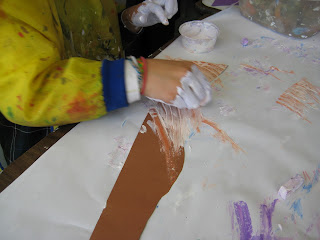
Another Van Gogh lesson doesn't seem incredibly original, but this project from Deep Space Sparkle explores the fun technique of chalk pastel dipped into tempera paint. This was also my Grade 2 students' favourite project this year and last, so it is definitely staying in the repertoire.

It requires some organization, quite a bit of paper cutting, and then a lot of clean-up....but when the results are as stunning as they are, it totally makes it worth it. And if you have the energy, this is best done at the end of the year when all of your pastels are broken anyways.

It's a great lesson to reinforce the concepts of foreground, middle-ground, and background, as well the design principle of movement. I like to talk about how Van Gogh's paintings have a thick impasto, and tell students that it is even rumoured that deep within the layers of his paint, some of it might still be wet. I like to emphasize that like Van Gogh, students should aim to create lots of texture in their paintings, not worrying about leaving blobs and clumps of the paint on the paper. They love this.


In her lesson, Patti suggests using white or coloured tempera paint. We just used white, which I put into shallow plastic cups, and then dipped in the coloured chalk pastel.

This project took us about three 45 minute blocks.


8.5.12

Patio Stones


I saw this idea for patio stones on Pinterest and decided to give it a go for a Mother's Day Art Club project. To be honest, I was a little apprehensive about using concrete, but these ended up being pretty easy and the clean-up wasn't too bad either.

First, it was near impossible to find a bag of concrete in downtown Vancouver (even at my nearest Home Depot!). I was about to give up-it was late and the night before I was going to do the project but my husband volunteered to go out on a motorcycle ride to find some. Thanks, husband!

Lucky for me, I didn't have to mix up the concrete either! One of my Art Club volunteers said she would do it. She didn't follow the recipe for the whole 30 pound bag, but just began with a little water in a mop bucket and started adding concrete little by little until it was the consistency of a thick milkshake.

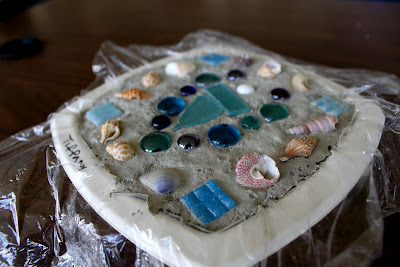
I found some great square-ish paper bowls, and we lined them with plastic wrap to prevent sticking/absorption. Students were to make a little sketch of their design on paper before getting their concrete. One they had it planned out, concrete was ladled in to the bowls, almost to the rim and then tapped down onto the table to minimize air bubbles. Then students got to choose from an assortment of glass beads, shells, sea glass, and mosaic tiles that I found at the craft store. The embellishments were pushed in so that they were almost flat with the concrete. (Some students that took too long committing to a design had trouble pushing in their objects because their concrete dried out too much .)


Some students ended up putting some coloured sand on top of their stones. I made the mistake of giving it to one student and then they ALL wanted it. It seemed to be falling off all over the place when the stones dried, so I'm not sure if any of it will stay or not. Oh well.


After about two days of drying on the window sill, I removed the stones from the bowls, along with the plastic wrap (most of it came off) and then placed them upside down to dry out a little more. They really only needed one more day to finish drying.


I think these turned out great...although some might be a little hard on the feet. :)


2.5.12

Lots and Lots of Kindergarten Flowers


Kinders were on flower overload these last two weeks. First, they made wildflower paintings and then this week, they did some stamping to make flowers in vases. But hey, I needed to brighten up the art room and make it at least seem like it's springtime. (It's been an overall cool, drippy, and dismal last couple of weeks.)

The wildflower lesson was very successful. I got the idea from this Fine Lines lesson here. I showed some images of wildflowers and we talked about how to create the flower stems by first pressing hard at the bottom of the black paper with construction paper crayons and then ending with a sweeping motion. Students used Q-Tips with liquid tempera to dab the flowers. I've only included a couple of very busy examples, because the sparser ones didn't photograph well on the black paper.


And this week, we worked on flowers in vases, using the lesson that I found on Colour for Everyone. Kinders each received a 6 x 4.5 piece of coloured construction paper. They folded the paper, drew an interesting line going down the side and then cut it out to make a symmetrical vase. After pasting it on some large white paper, they painted two or three large circles on the page using liquid tempera. They then used cut foam sponges (in rectangular and triangular shapes) to stamp the petals around the flowers.

I had red, yellow, and blue paints squeezed out on one tray and students used a brush to paint their sponged different colours before stamping. Next time, I think I'd have very separate paint trays, including the secondary colours and more sponges because the sponge shapes got very muddy with all of the colours being mixed together.

Here are a few: