Showing posts with label sculpture. Show all posts

5.2.13

Heart-Shaped Boxes


It was a very messy art club today! Glue everywhere! We are in the process of making some heart boxes from clay molds. First, students formed a heart shape with clay, then covered it with plastic wrap, and finally added two layers of gooey papier mache. Next week, I'll slice the boxes in half and students will use acrylics to paint them. Thank you to Kathy @ art projects for kids for this idea. 

Here are some pictures from the following week when I sliced the boxes open. I used a sharp utility knife to do so. Students then wiggled the hearts off of their molds, removed some of the plasic wrap that remained and then used acrylic paints to finish them. A couple of coats were needed.


5.1.13

Mask-Making with Grade 7


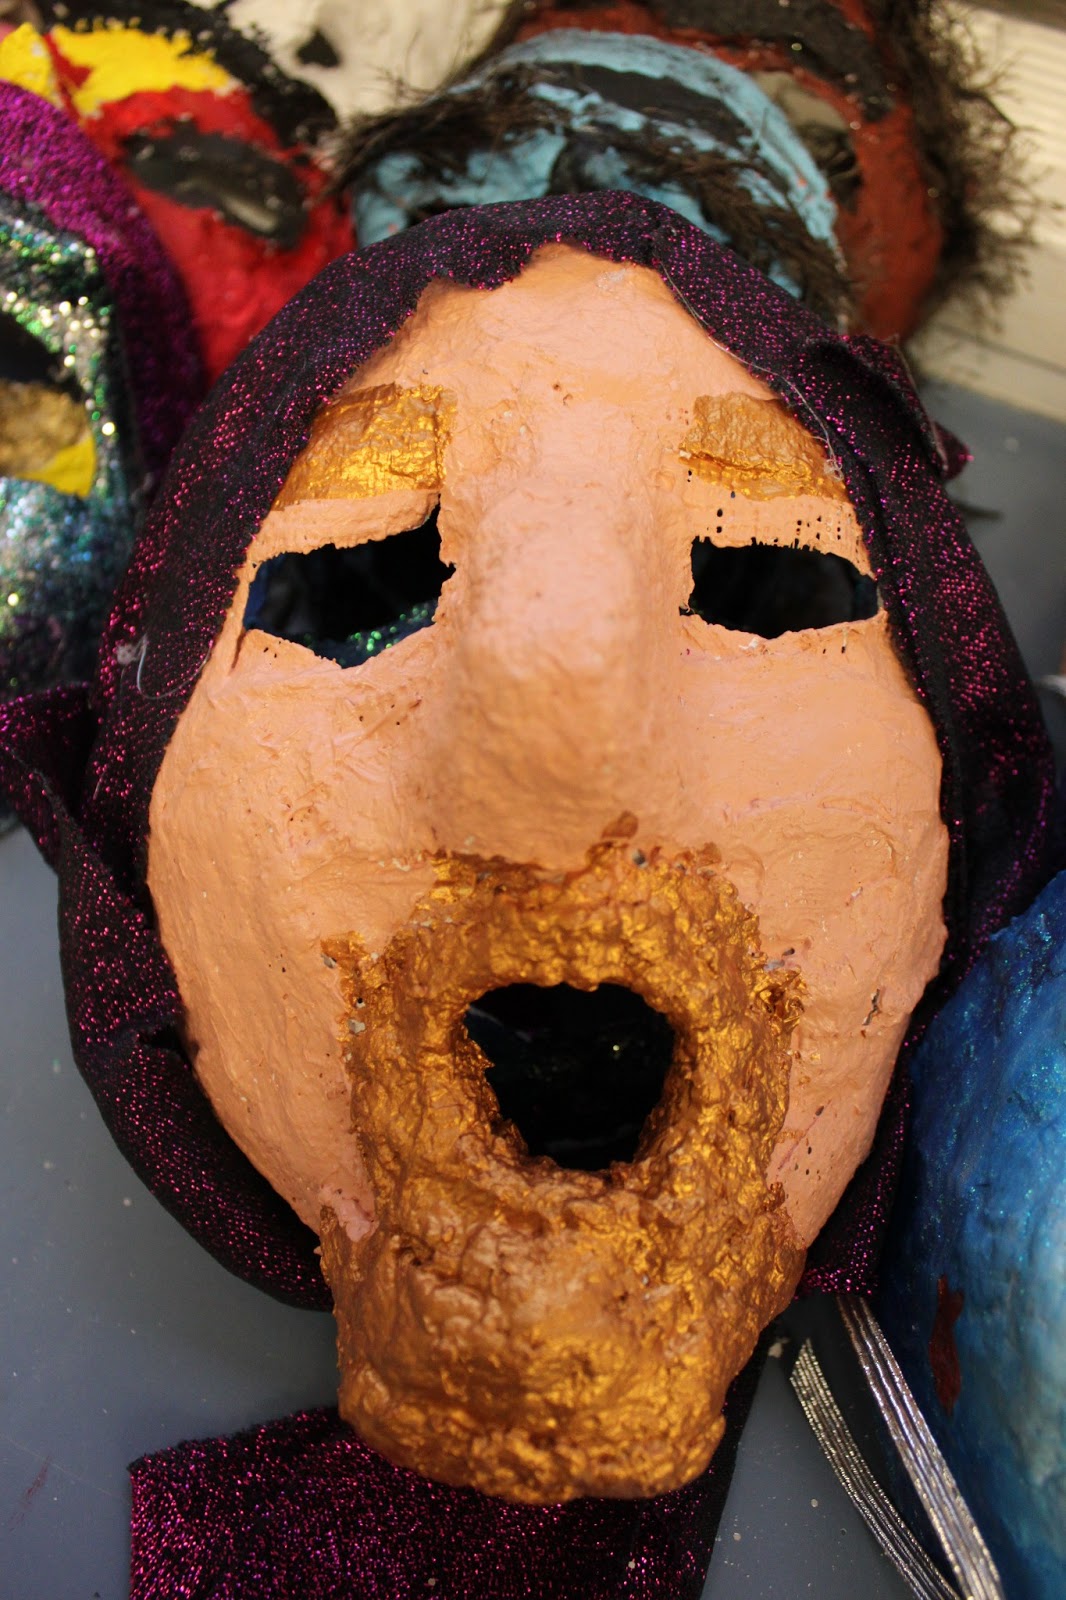
For a few terms now, I have been doing a mask-making project with Grade 7s. It's very involved, but the kids love it and I've found that almost everyone experiences a successful result. I've also loosely tied it in with a Social Studies unit where students study ancient Greece (and Greek theatre). I take about 20 minutes of the class before the mask-making to look at examples of Greek theatre masks and talk about the exaggerated facial features. Students roughly design their mask expression and theme before the next class.

Working in pairs, students put on garbage bags to protect their clothing, and then the first partner (the model) puts on a shower cap to protect their hair. A generous amount of Vaseline is applied to the model's face, making sure to cover the eyebrows and sideburns well. The model then sits down in a chair, head slightly back, and an exaggerated expression is made. The other partner begins applying small plaster strips (pre-cut into pieces of about 1 x 3 inches) dipped in lukewarm water, directly to the face.  (The plaster was purchased on a large roll at the art supply store.) Care is taken to avoid the eye area and the mouth. After applying strips all over the face, a second layer is added. Lastly, the nose area is covered and students have to breathe through their mouths for a little while.

A few minutes after the final strips are laid, I usually go around and check for weak spots in the masks before students remove them. If all is well, students start scrunching up their faces and wiggle the masks off. Masks are initialled with pencil on the inside, and laid to dry on balled-up newspaper.

The process is then repeated with the other partner. (It takes about 45 minutes to prep and cast each partner, so two blocks are needed to make sure everyone is casted.)

The next class, masks are dry and the exaggerated features can be built up using papier mâché pulp (I used Claycrete- a popular one found at art supply stores). As per package instructions, the pulp is mixed with water to create a clay-like consistency that can be molded and shaped into eyebrows, lips, noses, horns etc.
Some students take only one class block for this step (45 minutes), but others make take up to two, depending on how elaborate they want their masks to be.

Nose, chin, and horns are built up

Eyebrows and lips are built up

The pulp takes at least 48 hours to dry completely, and then paint can be applied. I have students use acrylics on their masks. With some colours, two layers of paint may need to be applied.


After the paint is dry, I give students several choices for finishing, such as adding gloss varnish, glitter, fabric embellishments (attached with a glue gun), or ribbons on the side of the masks.

Here are some of the amazing finished results. Students are hoping to perform with these masks in a play later this year.


12.11.12

Papier Mâché Birds (This Years' Version)

I just wanted to post a couple of pictures of the current Grade 3 class' papier mâché birds. I posted my original lesson last year here. Again, thanks to Julie at Art for Small Hands who inspired this project in the first place.

The Grade 3 classes from last year are still talking about their little birds, and this new crop of Grade 3s started asking me at the beginning of school if they would be able to make them. So here they are again. For some reason, it seemed as though this group needed much more support in making their bird bodies than the previous ones. For the few weeks that it took to make these (3-4 double classes) I felt like I was running here and there all over the room helping with a head, or a beak, or some droopy wings-but again, they were worth it.

They only change I made to the original lesson was to use bendable electrical wire for the bird feet-as the floral wire was so difficult for the students to bend themselves. It was great because more of them were able to do this part independently.  


7.3.12

Papier Mâché Birds-well worth it!

Golden Eagle and Woodpecker

This is it.....the best project with my Grade 3s by far. The kids completely fell in love with these papier mâché birds (that they got to know quite well over the 4 weeks we spent on them!).

First, thank you many times over to Julie at Art for Small Hands who created and posted this lesson. The project was quite involved, but she broke it down into easy, manageable steps.


My Grade 3 theme is Canadian art and artists, so I had each student choose to represent one bird that lives in Canada. I had them search through bird books to find one, and then they had to sketch a picture of it in their sketchbooks, colour it with pencil crayons, and make sure to label the type of bird it was as well.  Students went back to their sketches several times; when forming the bird's body shape, and when choosing paint colours.
Crow and Robin
Belted Kingfisher, Woodpecker, and Crow
Swallow

Several classes later, after building the body, layering with papier mâché, adding wire legs and a beak, acrylic painting, and varnishing (non-toxic), the birds were done! A long project, but well worth the time and effort.